Twenty-four hour bread
Making bread certainly takes time. But the wise man said, it doesn’t have to take your time. You can fairly easily work bread into whatever kind of timetable you happen to be working to.
In the old days, proper bakers used to prop a piece of wood over the rising dough and snooze through the night, safe in the knowledge that when the bread was sufficiently risen it would knock the wood off and wake them up. Hence the name “sleepless white” at the Handmade Bakery in Slaithwaite.
If you walk past the Barbakan deli in Manchester about 3 a.m. (probably after a late night curry) you will smell the bread baking ready for breakfast. During lockdown, they have taken the drastic step of limiting their bread offerings to just these -

At the Tartine bakery in San Francisco (where they basically have one loaf - the Tartine sourdough) the lazy bakers use the fridge to retard their dough so that they can do their work after breakfast, and the bread can be ready for tea time. Not a bad plan.
The rest of us are stuck with what Jamie Oliver would call our “3 hour bread head” on - rise, knock back, bake. In a sense this is not so very far removed from the thinking behind the dreaded Chorleywood process, which aims to reduce 3 hour bread to 60 minute bread. We want to make bread in whatever is the minimum amount of time that can do the job properly. But what does properly mean? And who decided that making bread was a 3 hour job in the first place?
Peter Gott of Sillfield Farm quite rightly questions the way our food industry works. When asked “what is the lowest price he can accept for the meat he produces?”, he says: no! The question should be “what is the highest price the customer can accept for the meat?”. That is the standard of meat he wants to produce, and even if it is not the price the customer wants to pay, it is the standard of meat the customer wants to eat.
So why not apply the same thinking to bread? Why ask “what is the minimum time I must set aside for bread making - 3 hours? 2 hours 1 hour?” That is the Chorleywood process mindset. Instead ask yourself “what is the maximum time I can spare to make the best bread I can make?”. That is the Peter Gott mindset.
The happy truth is that allowing 24 hours for bread making actually need not “waste” any more of your precious time than rushing to the oven in a couple of hours. You just spread your 20 minutes of TLC across 24 hours. If anything, it takes less effort to bake that way because you can fit in the odd 5 minutes here and there whenever you like. Say, when you put the kettle on, or let the cat out. Job done.
Far from wasting time, if you can spare it 24 hours to do its own thing, your yeast will use every minute of the time to break down your flour and develop the flavour and texture of your bread. So it’s a win-win - absolutely no pressure to get stuff done for your bread making, and a much better loaf at the end of it.
This idea first came my way when I heard Elizabeth David talking about it on the radio. It was just a throw away line really, but she said she was using very little yeast these days, and letting the dough rise very very slowly.
When you do sourdough, the golden rule is to let the dough take its time, watch what is happening, and react accordingly. All I’m saying here is try doing the same with everyday bread!
I’ve found this method so very satisfying that I don’t do it any other way now. I always start the bread off the day before baking. Some of you will have heard me say all this before, when I’ve advocated making a sponge the night before baking. So what’s the difference?
Making a sponge is a good way of allowing some of the dough to develop for a long time - maybe 12 hours The rest of the ingredients are added when you want to make your bread, and the bake continues at “normal” speed. This is really an adaptation of a sourdough technique. With sourdough you make a sponge to avoid the yeast going “over the top” and making the bread too sour.
Applying the same idea to yeasted bread is a sort of compromise, allowing some extra development, but not letting the batch get over proved.
With 24 hour bread, you avoid the danger of over proving by drastically cutting back on the amount of yeast you use. Instead of using the traditional 7g for a loaf, you will find that 1g of yeast is easily enough to make a loaf, provided it has enough time to do the job in a leisurely way.
What happens is that the tiny amount of yeast works away as normal, but you won’t see any sign at first, because there won’t be much gas produced for several hours. During the day, whenever you feel like it, you can give the dough a little work - just a couple of stretch and folds and back into the bowl. Before you go to bed, knock it back properly, because it will grow significantly overnight. Then in the morning knock it back and shape it, putting it into the basket or tin. The final rise in the tin or basket tends to take about 3 hours, but by that stage the bread will be beautifully developed and ready to bake.
If you start the whole process off at about midday, then the bread will be ready for the oven about midday the next day. You won’t be disappointed with the flavour!
I have been told that this method can result in a loaf that spreads rather than rises in the oven, so it is worth paying attention to the shaping stage, where you should be tightening the dough up as much as you can without tearing it. Bake with Jack has a good video about how to do this.
So finally, here is my recipe for a 24 hour loaf. You can vary just about anything apart from the amount of yeast!
450g strong white flour
50g Heron Corn Mill rye flour
1g (one gram) of fast action yeast
6g of salt
350g of water
50g Heron Corn Mill rye flour
1g (one gram) of fast action yeast
6g of salt
350g of water
Optional extras -
20g of linseeds whizzed in the coffee grinder for 2 seconds
10g of rye flakes
1 teaspoon of malt extract
A glug of olive oil
1 teaspoon of malt extract
A glug of olive oil
Mix up all the ingredients well in the bowl, making sure you have no dry bits
Cover and leave in the bowl for 30 minutes
Turn out and knead for 5-10 minutes
Return to the bowl and cover
At bed time, knock back and return to the bowl
After breakfast, turn out, shape (ideally twice as in the Bake with Jack video) and put in a basket or tin for the final rise
Leave for about 3 hours till well risen
Bake in a very hot oven for 10 mins and then turn down to 200 or 180 fan for another 40 minutes
Rest on a rack till cold
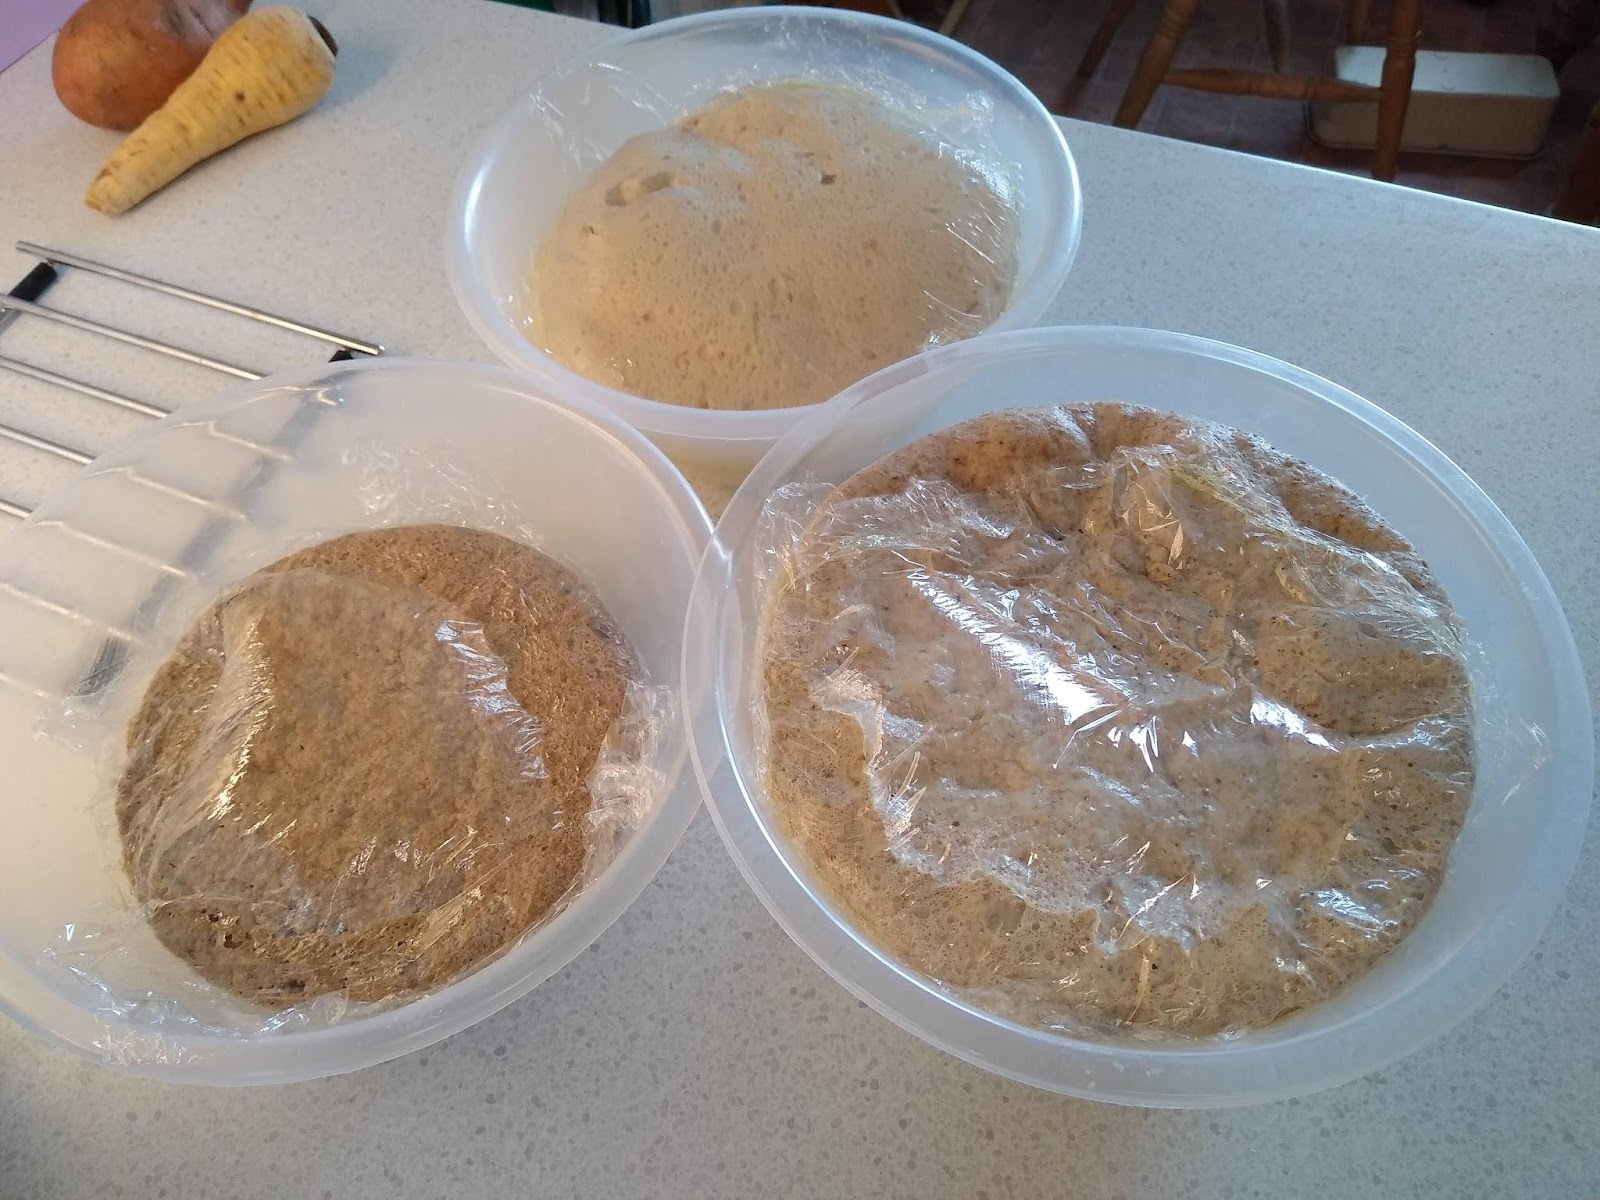
Tip number 1: to avoid developing a crust on the dough, oil the bowl before putting the dough back into it. Put the dough in upside down (rough bit on top) and pull the edges of the dough into the middle and press down to tighten up the dough. Then turn the dough smooth (and oily) side up again and cover with cling film. Tuck the cling film down the sides of the dough, and it will keep the surface moist all night, even as it rises.The oil will stop the clingfilm sticking to the dough.
Tip number 2: if you use this method for wholemeal flour, especially stoneground , use a little more yeast. A quarter of a flat teaspoonful should be about 1.25g which would work fine. And you could always consider buying a pair of high-precision scales. These are accurate to 0.1g and very useful for measuring yeast and salt.
These are 2 single loaves and (on the right) a double loaf in the morning, after rising all night using the 24 hour bread method. You can see the clingfilm has come away in places on the brown loaves, but has worked particularly well on the white loaf -
With any luck your bread will turn out like this -